Sunday, June 2, 2013

Caviar Nails


I keep seeing Caviar Nails on Pinterest.  I wanted to try them, but not at the hefty price tag that the kits cost.  So I picked up some microbeads from Michael's.  

Basecoat of Instra Dry "Lively Lilac".  Then I poured on the beads, pressed them in, and then did another coat.  I then did a top coat on my plain nails of Sinful "Purple Diamond".  I also did a top coat of Seche Vite on the microbeads.


Blurry closeup of the microbeads.

Gradients

I've liked doing gradients since I first learned how.  Here are 2 recent ones:

1. Gradient done with Revlon "Grape" and Sinful "I Love You".  Then stamped in black with Cheeky plate CH8.


2. Base of OPI "Candid Cameron", then gradient of OPI "Candid Cameron", Sinful "Midnight Blue", and Color Show "Bold Gold".


Tuesday, May 14, 2013

Recent Projects

Here are a few of my recent projects.  Life has gotten busy so I haven't had time to post, or capture all my designs, but these are 3 that I did remember to capture.

1. Base of LA Colors "Treasure Island" and stamped with disk Pueen05 in Revlon "Metallic"


2. Base of Sinful Colors "Happy Ending", then taped off using these, and then topped with Insta-Dry "Brisk Blue" and a final top coat of Sinful Colors "Opal Glitter"

3. Base coat of Sinful Colors "Courtney Orange" then I poured on neon orange loose glitter from the Recollections collections from Michaels.  Topped with 3 coats of Insta Dry "Clearly Quick"

Also, hit a super clearance at Target and was able to get 6 double packs of Insta Dry.  I picked up "Brisk Blue", "Lickety-Split Lime", "Lively Lilac", "Slick Slate", "Snappy Sorbet", and "Sonic Boom".  Each pack also had a "Clearly Quick" so 12 bottles total for $12.  I was so excited!  Especially since all these colors work good for stamping.  :)

Friday, April 5, 2013

Using Stamps

I was bored today, so I decided to try out my new stamps.  The collection I got was Gals 2013 Princess Set (you can get it here).

I did an ombre of Sally Hansen XtremeWear in "Hot Magenta" and "Marine Scene".  Then I stamped with disk GA15.  This is the result.


I like it.  I also cleaned up with my new Nail Polish Remover Pens.  I found it was easier to dip the pen in polish remover and use it that way.  Not exactly how they are recommended, but it works better than q-tips.

Monday, April 1, 2013

New Tool

My birthday present from my in-laws was a gift card to to Amazon.  I purchased all nail based things with it.  One of them got here today.  They are nail polish remover pens.  You can buy them here.

I used them quickly, and they worked pretty good.  I think I will actually focus more on what I am doing next time (I was too busy watching Wicked Single on VH1, super trashy but fun!).

I did an easy manicure of Sally Hansen Insta Dry in Grape Going! and did an accent nail in Sally Hansen Gem Crush Jeweled.


Sunday, March 24, 2013

Dots

I saw a tutorial here and wanted to try out my dot tools.

I did a base coat of Revlon "Charismatic" then dots in Sally Hansen Hard as Nails "Limestone", followed by dots of Sinful Colors "Gorgeous" and Sinful Colors "Let's Talk".  Top coat of Seche Vite.


Saturday, March 2, 2013

Trying Taped Paint

Last night, I found my scrapbook scissors that have 8 different designs.  I used a base coat of Sally Hansen Quick Dry in "Speedy Sunburst".  I taped off the bottom and painted the tips in Hard as Nails "Posh Plum"


Friday, March 1, 2013

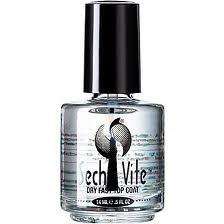
Seche Vite

OMG, got this yesterday, and I am IN LOVE!  1 coat on still wet nails, and within 2 minutes they are dry and rock hard.

Sunday, February 24, 2013

Glitter Tips


I used Sinful Colors "Blue By You" and Sinful Colors "All About You".  Base coat of "Blue By You", then sponged "All About You" on tips.


Monday, February 18, 2013

Playing Around With Pink

Basecoat of China Glaze "Rainbow" then stamped using Cheeky Plate CH11 and LA Colors  Bright Pink.

Friday, February 15, 2013

Friday Challenge: Make Glue Bottle

I saw an article on Pinterest about how if you use glue under glitter nail polish, it will peal off easier than soaking it off.  I wanted to use a nail polish bottle like they use in the article, so I needed to clean out one of my old used nail polishes.

I used the following tutorial on YouTube.  It was VERY easy and took maybe 3 minutes to get the clean bottle and fill it with Elmer's glue.

I put on two layers of glue as a base coat, letting each layer dry completely between coats.

This is what it looked like after those two coats.


To try the glue out, I added three coats of Sinful "I Miss You".  This also gave me a good chance to see what it looks like.

One Coat
 Two coats
 Three Coats
Done with with top coat.  :)


I'll report back in a few days when I take off the glitter.

EDITED:
This is the process to take off the glue/glitter...

Taking off the glitter.  I just used an orange stick to push under the polish and it popped right off.


After all popped off.  It was super easy.  I will definitely use this method in the future.

Thursday, February 14, 2013

What I have done so far...

I am still learning a lot of the concepts of nail art.  I have done a lot of plain nail colors with the accent nail.  I also rock glitter a lot as well (although that gets annoying because glitter is so hard to get off when you want to change out the polish).  Recently I started trying out the ombre color technique.  I also got my first stamper last week so that has been fun as well.

Below are two of the ombre patterns I have done in the past week.

Green Ombre...


Basecoat of Sinful "Snow Me White".  Ombre done with Sinful "Last Chance", Sinful "HD Nails" and Sinful "Happy Ending" (Although you can't really see the "Happy Ending").  

This is also before I cleaned them up all the way, so they are a little sloppy around the cuticles.


Fire Ombre...

Basecoat of NYC "Taxi Yellow".  Ombre done with Sinful "Courtney Orange" and Sinful "Cloud 9".  Then using Cheeky Plate CH16, and Sinful "Black on Black" I added the top squiggles.

Again, this is also before I cleaned them up all the way, so they are a little sloppy around the cuticles.


More to come as the mood strikes!

Adventures in Nail Polish

So Pinterest is evil...  Since joining, I have developed a bit of an obsession with nail pins.  Currently I have 151 pins.  It could be worse, but has lots of fabulous ideas.  This blog is my way of showcasing my ventures in creative nails without having to bore my friends and family with my changes in polish.

I also follow a couple of different bloggers to get ideas as well. They are:


Current List of My Colors (As of 04-01-13):
Chameleon
“Cyclone”
China Glaze “Avalanche”
China Glaze
“Lubu Heels”
China Glaze “Platinum Pieces”
China Glaze
“Rainbow”
China Glaze
“Ruby Pumps”
China Glaze “Sexy Silhouette”
China Glaze “VIII”
Cacique
“Blue Jean Baby”
Cacique
“Color Me Purple”
Cacique
“Sea Goddess”
Color Show
“Bold Gold”
Color Show “Magenta Mirage”
Color Show “Navy Narcissist”
Color Show “Purple Possibilities”
Crackle
“Star Burst”
Crackle
“Wave Break”
Cutie Girl
“Natural Shimmer”
Diamond Strength
“Must Have Iris”
Diamond Strength
“Save the Date”
Donna Michelle
Pink Sparkle
Elf
“Gold Glitter”
Essence
“Magic Wand”
Essence Crack
“Pearly Pink”
Essence “Purplicious”
Hard as Nails “Hot Magenta”
Hard as Nails
“Limestone”
Hard as Nails “Marine Scene”
Hard as Nails “Posh Plum”
Hard as Nails “Red Carpet”
Hard as Nails
“Wet Cement”
Hard Candy
“Crush on Lava”
Hard Candy
“Sweet Tooth”
Icing
“Blushing Bride”
Icing
“White”
Insta Dry
“Grape Going!”
Insta Dry
Speedy Sunburst”
LA Colors “Bright Pink”
LA Colors “Grapevine”
LA Colors “Merlot”
LA Colors “Phenomena”
LA Colors “Radiation”
LA Colors “Shock”
Magnetique
“Green”
Magnetique
“Pink”
Magnetique
“Silver”
Milani
“Purple Streak”
Milani
“Shady Gray”
Milani
“Spoiled in Fuchsia”
Nail Art
“Black Glitter
NYC
“Big Money”
NYC
“Classic Coral”
NYC
“French White”
NYC
“Luxury Lime”
NYC
“Starry Silver”
NYC
“Taxi Yellow”
OPI
“Ink”
Orly
“Red Flare”
Pure Ice “Crimson”
Pure Ice
“Excuse Me”
Pure Ice
“Keep Walking”
Pure Ice
“Sheer Luck”
Pure Ice “Super Star”
Revlon
“Charismatic”
Revlon
“Cloud”
Revlon
“Grape”
Revlon
“Metallic”
Revlon
“Varnished”
Sally Hansen Gem Crush
 “Be Jeweled”
Sally Hansen Magnetic
“Electric Emerald”
Sally Hansen Magnetic
“Golden Conduct”
Sinful
“All about You”
Sinful
“Amethyst”
Sinful
“Bali Mist”
Sinful
“Black on Black”
Sinful
“Blue By You
Sinful
“Cloud 9”
Sinful “Courtney Orange”
Sinful
“Forget Now”
Sinful
Gorgeous
Sinful
“Happy Ending”
Sinful
“HD Nails”
Sinful
“I’ll Miss You”
Sinful
“I Love You”
Sinful
“In The Spotlight
Sinful
“Irish Green”
Sinful
“Last Chance”
Sinful
“Let’s Talk”
Sinful
“Let’s Talk”
Sinful
“Love Nails”
Sinful
“Mint Apple”
Sinful
“Nail Junkie”
Sinful
“Opal Glitter”
Sinful
“Out of this World”
Sinful
“Purple Diamond”
Sinful
“Snow Me White”
Sonia Kashuk
“All Vamped”
Sonia Kashuk
“Emerald City”
Sonia Kashuk
“Hocus Pocus”
Wet & Wild
“Caribbean Frost”
Wet & Wild
“Duchess”
Wet & Wild
“Gray’s Anatomy”
Wet & Wild
“Hollywood Walk of Fame”
Wet & Wild
“Make Them Boys Go Loco”
Wet & Wild
“Party of 5”
Wet & Wild
“Sunny Side Up”
Wet & Wild
“Sparked”


Elmers Glue
Icing
Top Coat
Sally Hansen
Advance Hard as Nails
Sally Hansen
Diamond Strength Hardener
Sally Hansen
Dry Kwik
Sally Hansen
Strengthening Top Coat
Sally Hansen
Vita Surge Cuticle Gel
Essie
First Base
Base Coat
Top Coat
NutraNails
5 tp 7 Growth Formula
As you can see, I prefer Sinful Colors.  Why?  They are inexpensive (under $2 a bottle at Target), and they have a good selection of colors.  Of all my colors I really dislike the Elf Gold Glitter.  It smells REALLY strong and isn't a good glitter coverage.  I would definitely recommend staying away from Elf.

Supplies I Have:


Variety of Files (I don't cut my nails anymore, I file them down and keep them up this way.)


Sally Hansen Base and Top Coats